Notify
Background
The templates we use are in Sirius Supervision Email templates. The annual reports each have their own letter template. The queue consumer fills the missing data in like a twig template.
To see new emails/ letters check the API integrations tab. If it has an address it’s a letter, if it has an email address then it’s an email. For each notify document we attach the notify ID and status into the documents table in the database, you can check a document status here.
The notify status poller (which is a whole different repo) checks every 10-15 minutes around 100 documents which are in progress (i.e. they have a status of QUEUED or POSTING) to see if they are still in progress. It tries to update them if they can.
Local Testing in Notify
Inside opg-notify-queue-consumer
- Create a
local.envfile. You can do this by looking in the readme and following the command around building. - We can add sensitive info to this
local.envfile as it won’t be committed. In this instance you need to add the Key from AWS-Secrets-Manager, use the preprod secret for local development testing. - Add this key to the
local.envfile, where it says OPG_NOTIFY_API_KEY. Use the whole key (it will look something like ‘Supervision_Finance_invoice_test_key’ with a load of random numbers/ letters after).
Inside opg-sirius
- Copy and paste this key to 2 other places in the Opg-Sirius repo. This is:
notify-queue-consumer/docker-compose.secrets.envandnotify-status-poller/docker-compose.secrets.env. Again you will just amend the password after ‘OPG_NOTIFY_API_KEY’ with the same password you put in the previous file, copied from AWS-secrets-manager.
Inside opg-notify-queue-consumer
- Build a new docker container with your new
local.envfile in it. Run:docker build --file docker/Dockerfile --tag 311462405659.dkr.ecr.eu-west-1.amazonaws.com/notify-queue-consumer ./
Inside opg-sirius
- Do a
make down dev-upto create a new environment that uses the new notify-queue-consumer container - Now run the behat to generate the letter/ update statuses which runs to notify
- E.g. back-end/tests/Behat/V1/features/cases/orders/scheduled-letters/schedule-bs1-letter.feature
Go to Notify dashboard
- Check the API Integration tab, and then refresh it then new letter should be at the top of the list.
- The document should tell you it’s been generated from ‘Supervision Preproduction’ (while most come from ‘Supervision Production’)
- If you open this file you can see the letter attached with your test data.
If your letter is not generated
- If it’s passed the tests on the sirius repo side check the notify consumer logs.
Testing Notify in adhoc
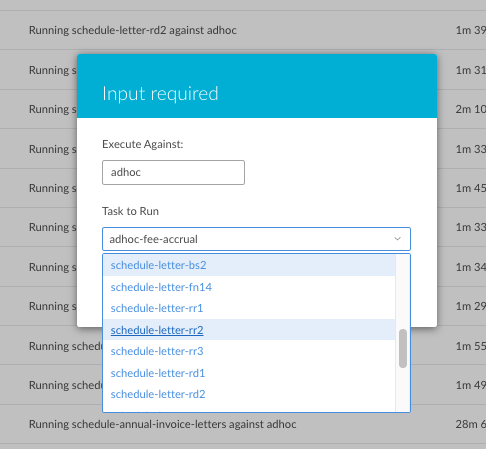
- You can run notify against the adhoc environment to test how the nightly task will run.
- Go to the Jenkins run nightly task pipeline

- Choose to run it against adhoc and whatever letter you want generating

- When this has run through you should find your document on both the sirius document page for the client and also in Notify.
- For this to work it will need to be valid to run the task (for example it must be within the valid date range for the task).
- If you have issues with the letter not generating check the
annual_report_letter_statustable to see if there is an entry for the letter. Notify will not create a second letter if there is an entry in this table. Make sure to delete it if one is there.
Dead letter queue
- If something goes wrong and the letters fail to generate in production they will turn up on the dead letter queue.
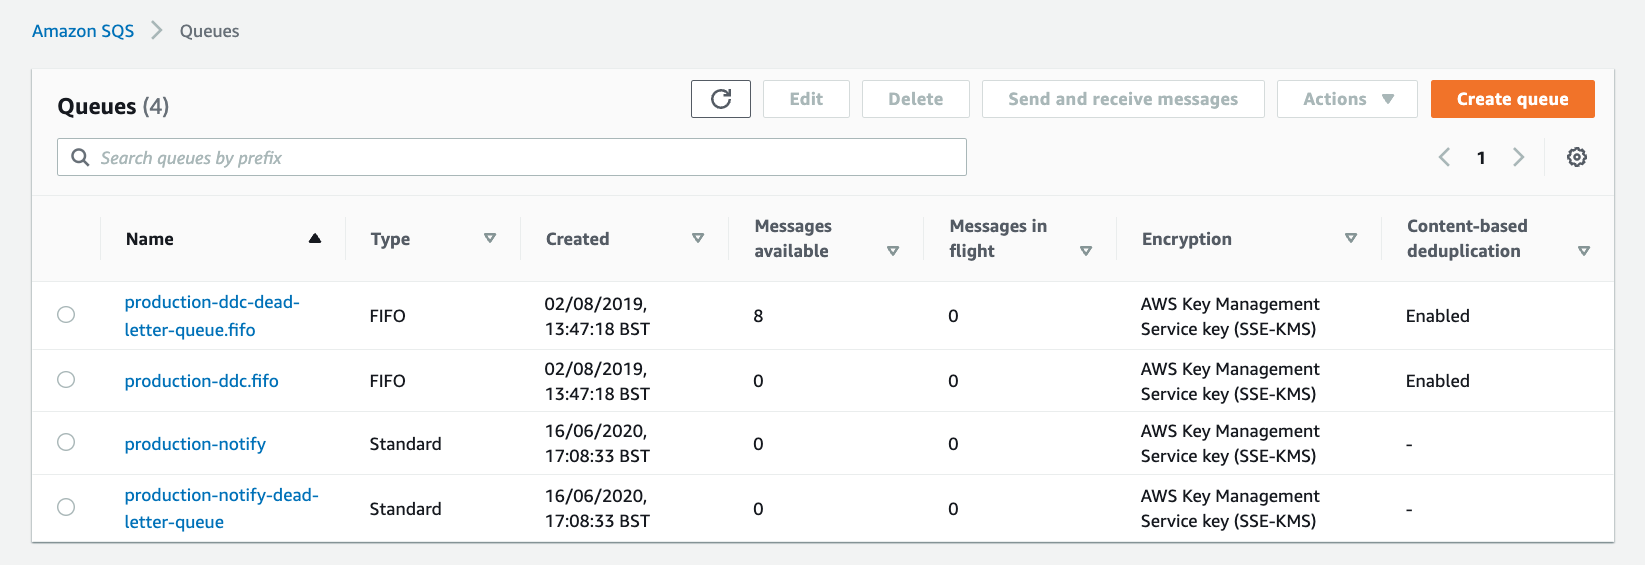
- You can find this under SQS > Queues

- Use the production login for this
- The queues are divided into DDC and notify
- Click on the notify dead letter queue (
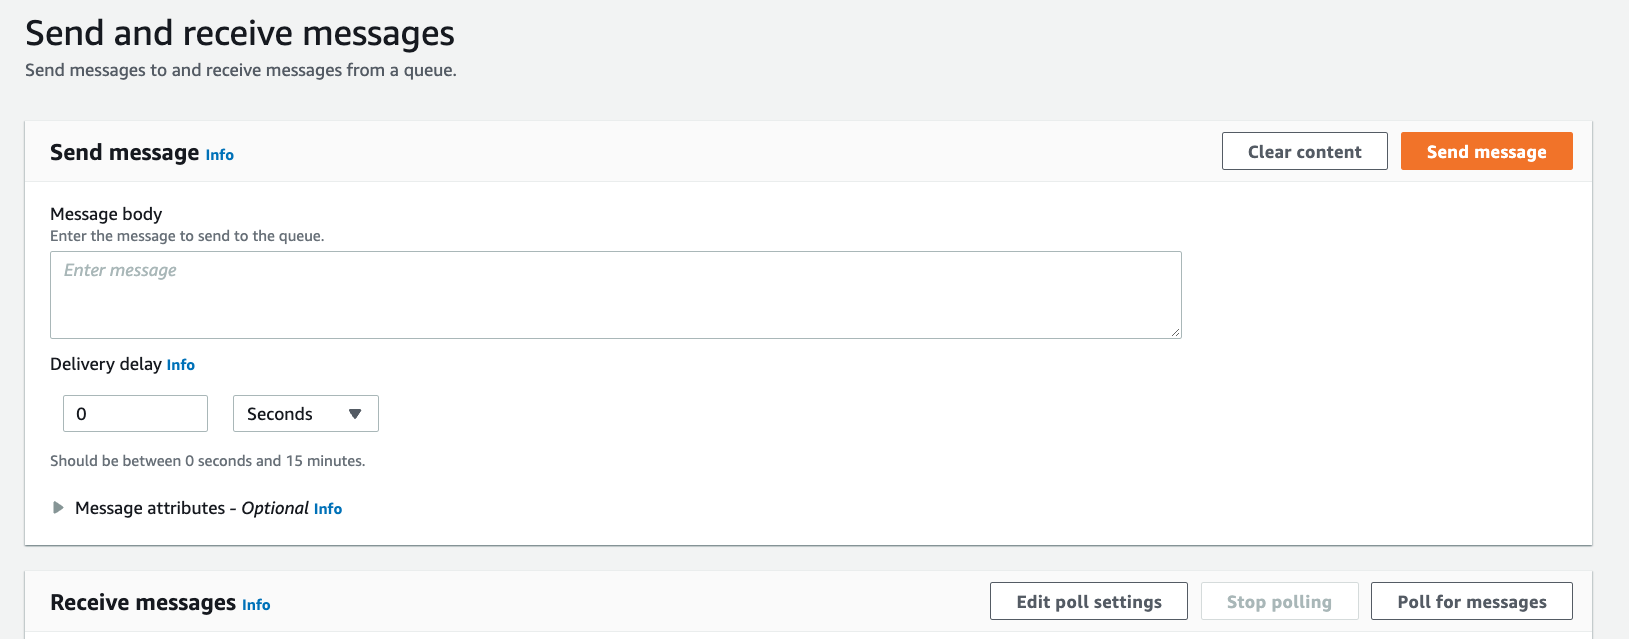
production-notify-dead-letter-queue), you can find out more information about why the letters did not send by clickingsend and receive messagesand thenpoll for messages.


This will pull 10 letters from the dead letter queue so you can compare it to the template to see why it failed. Using any of the messages retrieved, you can click and see the fields and their respective values that make up the message. - If you have fixed the issue and want to requeue the letters go back to the
production-notify-dead-letter-queuepage and clickstart DLQ redriveand then clickDLQ redriveat the bottom of this page. - When you look at the main SQS queue page you should see an increase in the
messages availableshowing next to theproduction-notifyamount instead. - Messages that have been pulled into
poll for messageswon’t automatically move over with the rest of the letters but if you refresh the page you should be able to transfer them using theDLQ redriveafter a few minutes. Heading over to the Notify dashboard and API integration should then confirm the messages being processed by Notify.
This page was last reviewed on 10 August 2021.
It needs to be reviewed again on 7 September 2021
by the page owner #opg-sirius-develop
.
This page was set to be reviewed before 7 September 2021
by the page owner #opg-sirius-develop.
This might mean the content is out of date.